- Mini elastic bands
- Paddle brush
- A tail comb
- Sectioning clips
Directions:
- First, separate the hair into 3 parts (left, middle and right).
- Then, start with the middle section. Separate the hair from the middle section into 5 strand of hair.
- After that, take the first strand hair from the right and then go over the second strand hair, then go under the third strand hair. After that, take the first strand hair from the left and then go over the second strand hair on the left and then go under the strand of hair that was left when you first did for the right hand side.
- Then, go back to the left section and continue with the same process.
- After you have braid all the hair, use an elastic band to secure the braid.


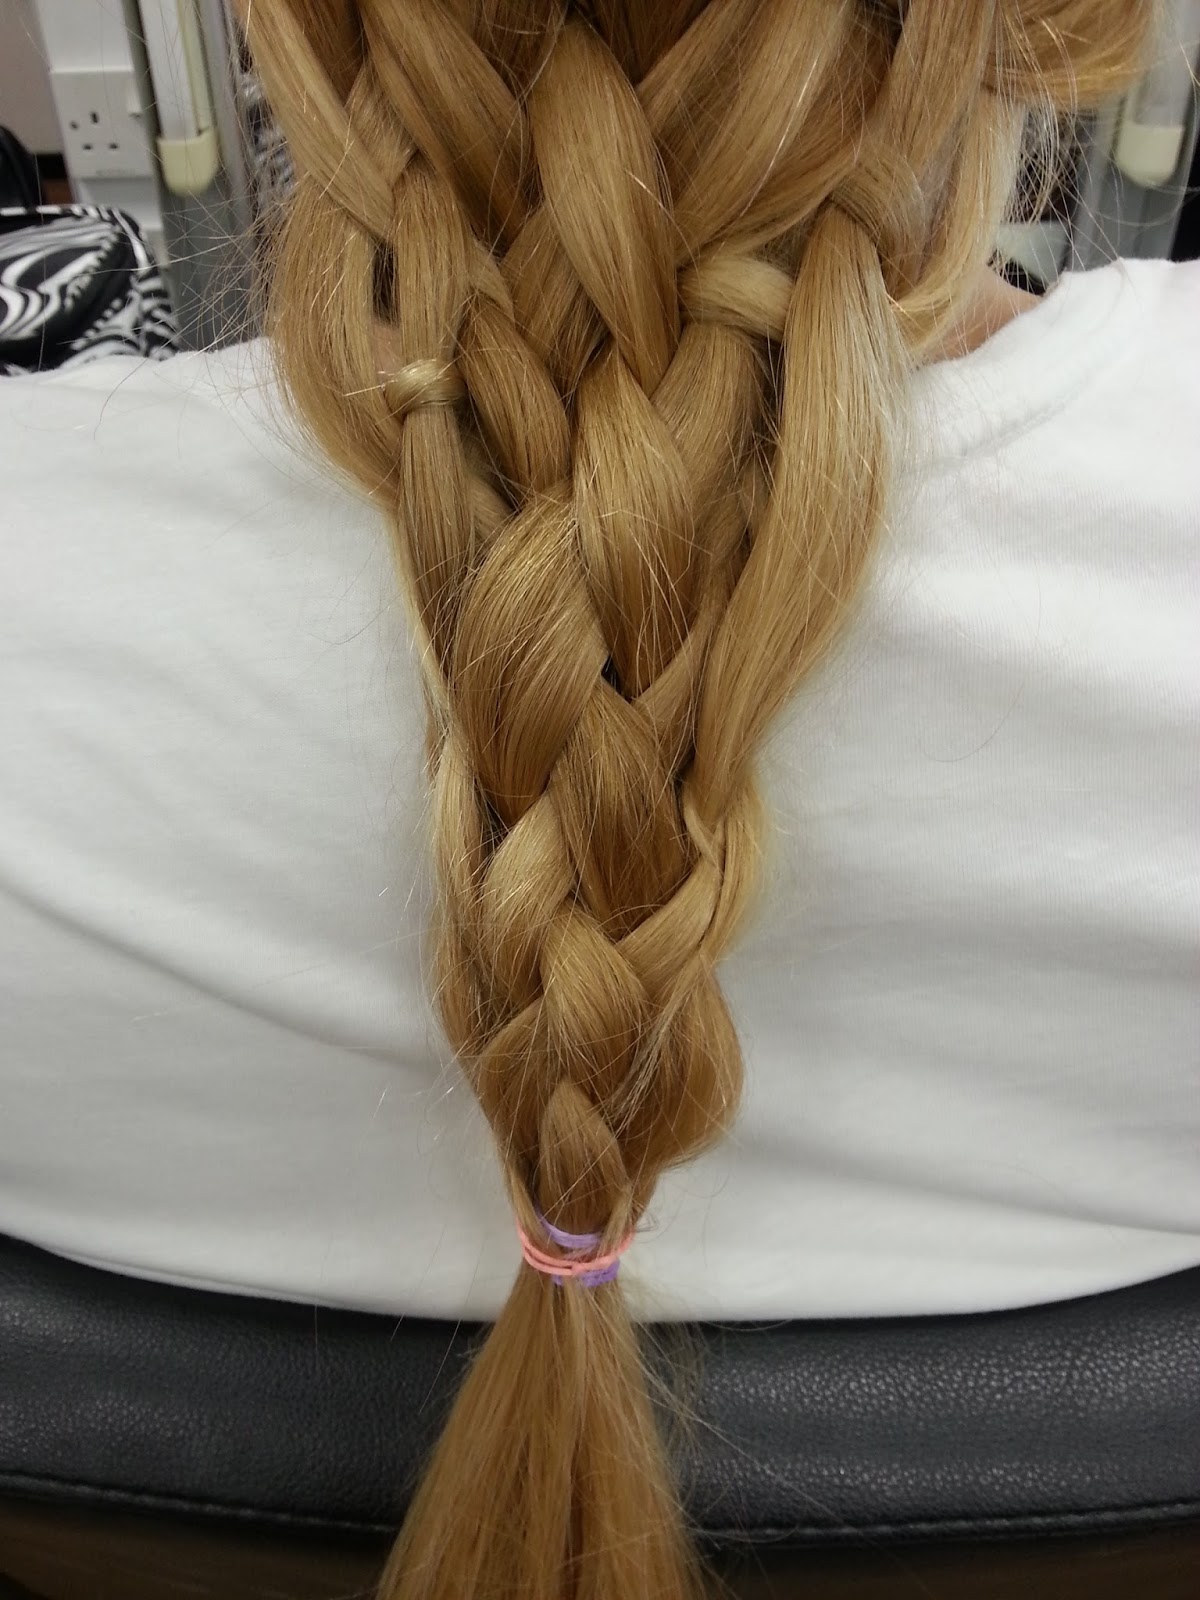
8 strand braid-
Directions:
- To create 8 strand braid, we will be continue with the process of the 5 strand braid. I did the 8 strand braid on the right hand side.
- On the right section, divide the hair into 3 parts. Then, start braiding with three strand braid. But remember you need to put one strand of hair from the three strand braid into the 5 strand braid which means whenever you braid once the three strand braid, you will need to put one strand of hair to the 5 strand braid so to make them connect together. Repeat the same process till you reach the end of the hair.
- Use an elastic hair band to secure the bottom.


11 strand braid-
Directions:
- We will be continue with the process of the 8 strand braid. It is the same process as the 8 strand braid, but this time we will do the remaining section of hair which is on the left.


Dutch Plait-
Directions:
- Brush the hair with the paddle brush.
- The, start from the top part of the hair. Grab a section of hair from the top in the middle of the head.
- Divide the hair into 3 sections. It is similar with the method of doing a french plait, but this time, we will plait by going under the hair.
- For the right strand hair, go under the middle strand hair and then the left strand hair going under and become the middle section. Do around two times with this process before starting to add hair from the side.
- Then, start adding hair from the side. Add a strand of hair from the right and then add to the plait. After that, remember to go under the stand of hair which will become the middle section and then add hair from the left, joining the hair from the plait and then go under the strand of hair which now, it will become the middle section. Repeat the same process until you have reached the bottom of the hair.
- Secure the hair with an elastic hair band.


Waterfall Braid-
Directions:
- Brush through the hair with the paddle brush.
- Then, start from the side of the head and take a strand of hair.
- Divide the hair into 3 strands and start braiding the 3 strand braid once to secure the shape more.
- After that, add one strand of hair from the top part and then braid the hair. Leave a strand of hair down each time after you have braid the hair add section of hair and leave one strand of hair down. Ask you model to hold the hair which you leave it down as it helps to secure the shape of the braid more.
- Secure the braid with a elastic hair band when you have finished.


Ladder Braid-
Directions:
- Continue with the process of the waterfall braid. Grab a section of hair underneath the waterfall braid which you have just created.
- Then, divide the hair into 3 strands and start braiding normal 3 strand braid. But this time, you will add the hair which was left down from the waterfall braid and join in with the braid you are doing.
- After you have finished braiding the rest of the hair, secure the braid with an elastic hair band.


Skeleton Braid-
Directions:
- This time, I have take a strand of hair from the side of the head and start braiding a normal 3 strand braid. It's up to you and you can start braiding the hair in the middle of the head and then add hair from the side as well.
- Then, grab a strand of the hair from the middle part of the head, add the hair to the braid and continue braiding. Continue with the same process until you have reached the bottom part of the hair.
- Secure the hair with an elastic hair band.


For the skeleton braid, you can move it around and place in different directions you want to achieve different looks.
After this lesson, I have learnt different types of braiding and plaiting methods. At first, when every time I looked at the 11 strand braid, I will think it looks very complicated and difficult to do. But during this lesson, I have practiced doing the braid which allows me to understand more about braiding and I realise that it is not as complicated as I thought it would be and after I get the idea of how to do it, it gets better and I am more confident about it now.
No comments:
Post a Comment